Pac-Man Arcade
Summary
Some pictures of, and details about, my custom Pac-Man arcade cabinet.
Some Pictures
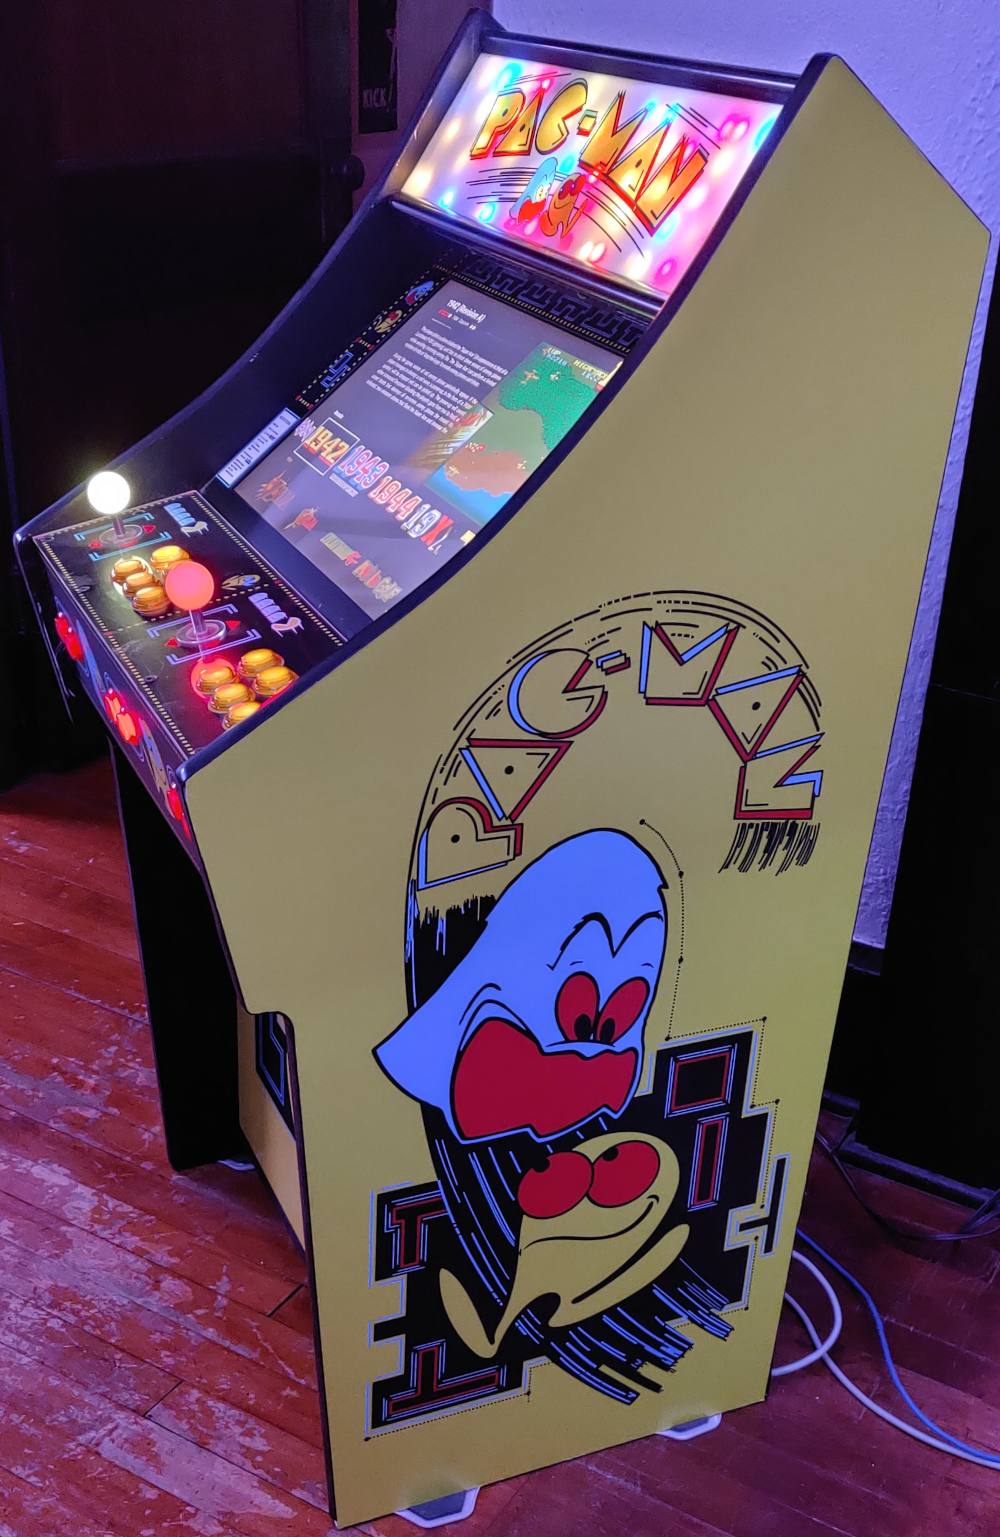
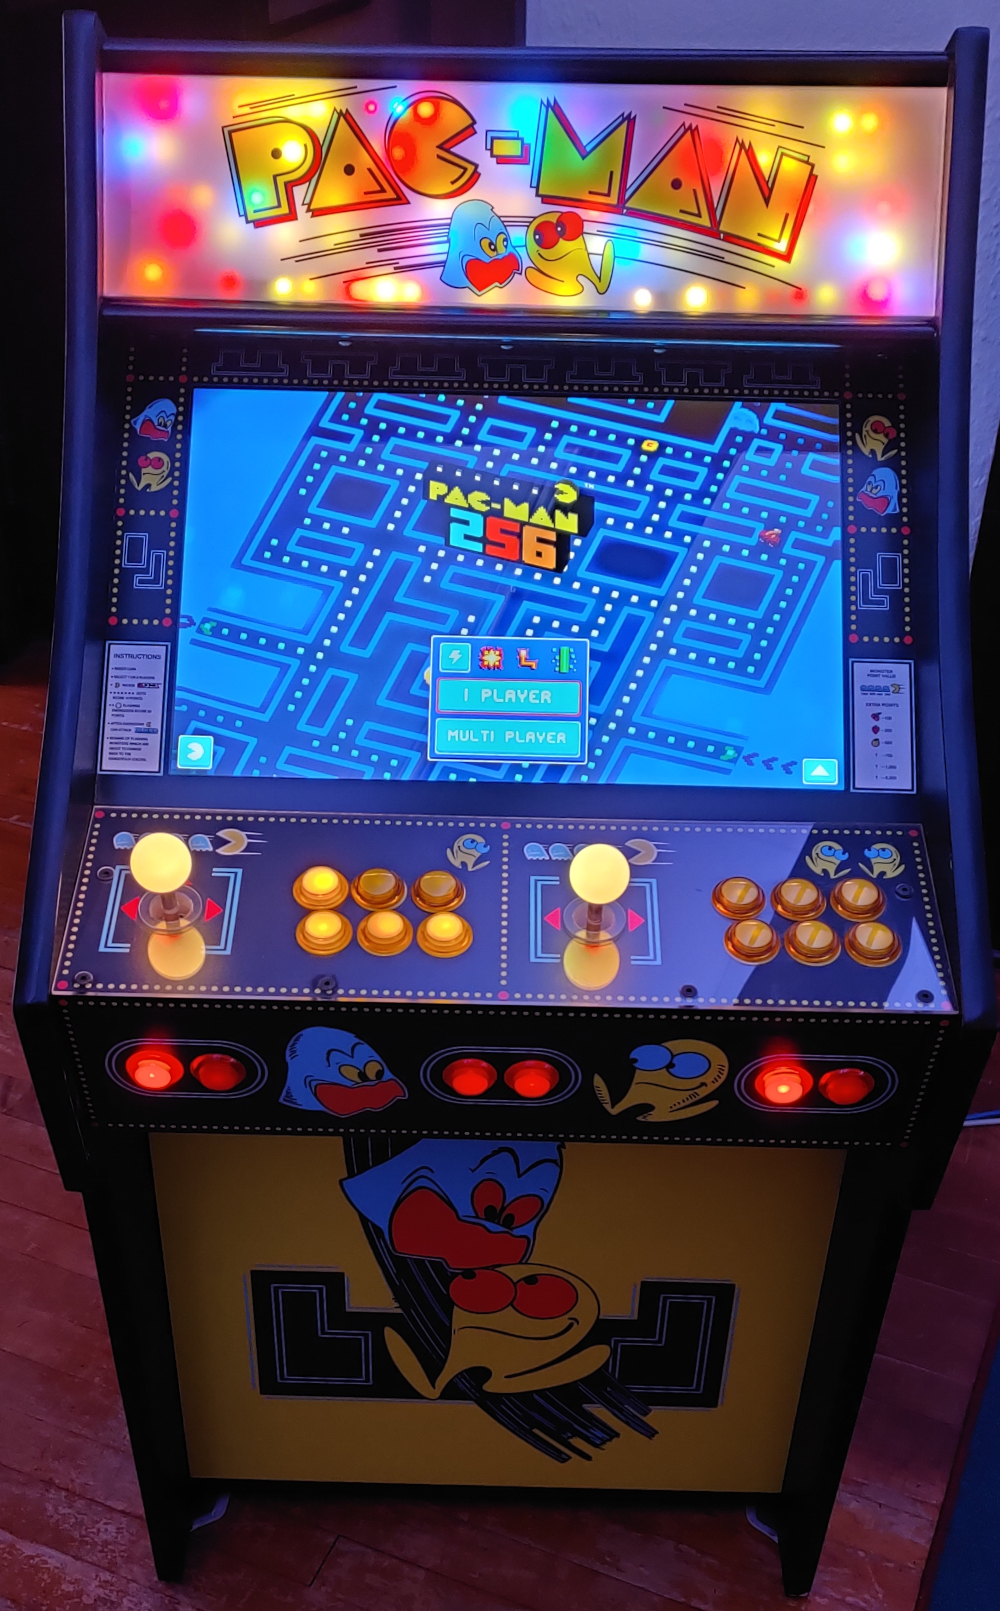
Some pictures of the final build.

Inspiration
At the end of 2019 I had decided I wanted to build a 3/4 scale arcade cabinet. I started looking around at some various cabinets and happened to come across this Pac-Man Lowboy. I definitely fell in love with the lowboy style and it’s clean lines. I compared basically every known arcade cabinet profile before deciding that I wanted to make a scaled down lowboy.
More Details
I made a detailed estimate and plans before building this project. Originally I had intended to make all those materials available but after working on this post for a while I decided it wasn’t really worth it. Everything is custom designed to fit the monitor and parts that I used, and requires a pocket jig and a bunch of other custom hardware and electronics. Anyone who is willing and able to put it all together is probably already capable of doing all the other work themselves anyway so I decided it really was not worth the effort. If you want more detail or a copy of my plans or anything else feel free to contact me and I will be happy to provide anything I can.
I was lucky enough to find some sketchup files for a lowboy design. I used them as the base for my plans and scaled / modified them until I could use them as the base for my measurements. I transferred all the measurements to paper to make it easier to read when I was actually building. I do have scanned versions of the plans which I used to transfer all the measurements to the real world so if you are interested let me know.
The source for the artwork I used came from classicgaming.cc. I do not own the copyright to the Pac-Man artwork and from what I understand Bandai Namco Entertainment does. I modified the side art and cleaned some things up I did not like and scaled everything down to fit my Lowboy. The panel is custom designed to fit my MAME needs and be 2-player.
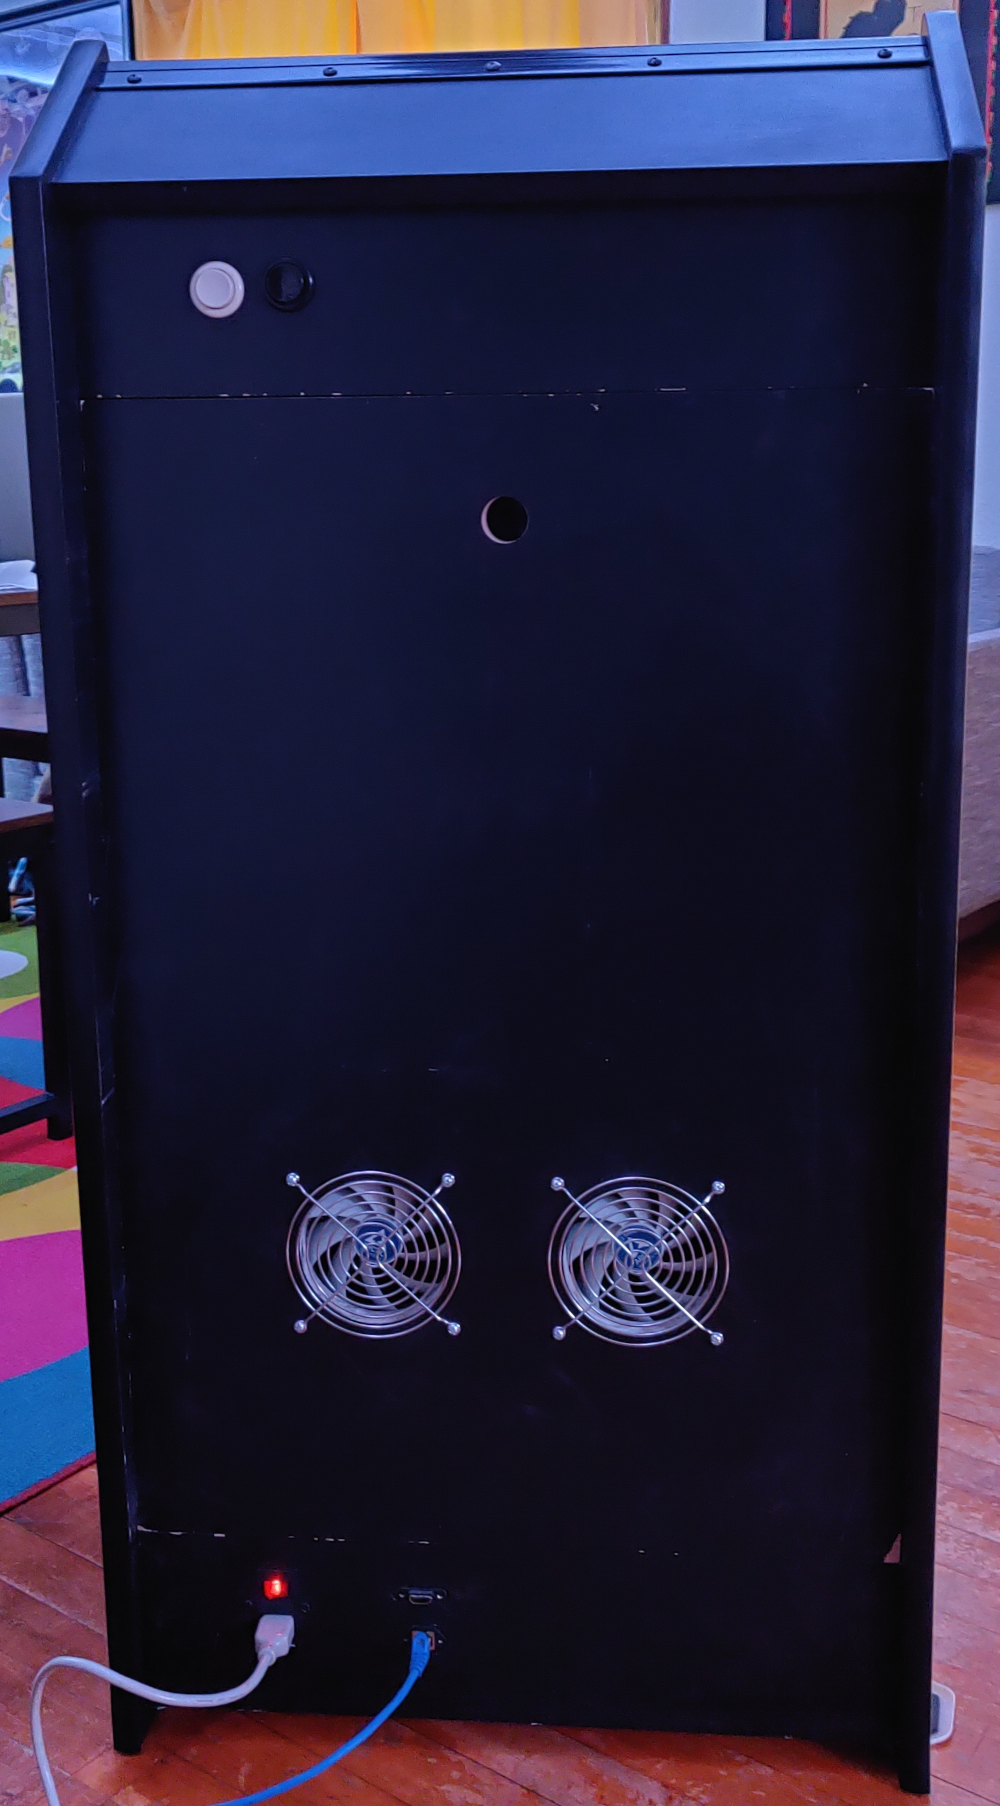
The back of the cabinet has a power jack, RJ-45 jack and an HDMI output jack. There is also a pair of old arcade buttons I had, which I use to send power on / off signals to the computer via the I-PAC. Flipping the power switch on the power jack will already cause the computer inside to boot up. There are a pair of 120mm fans for keeping everything cool and plenty of airflow since the panels at the top of the back leave a nice hidden gap to allow for hot air to escape.
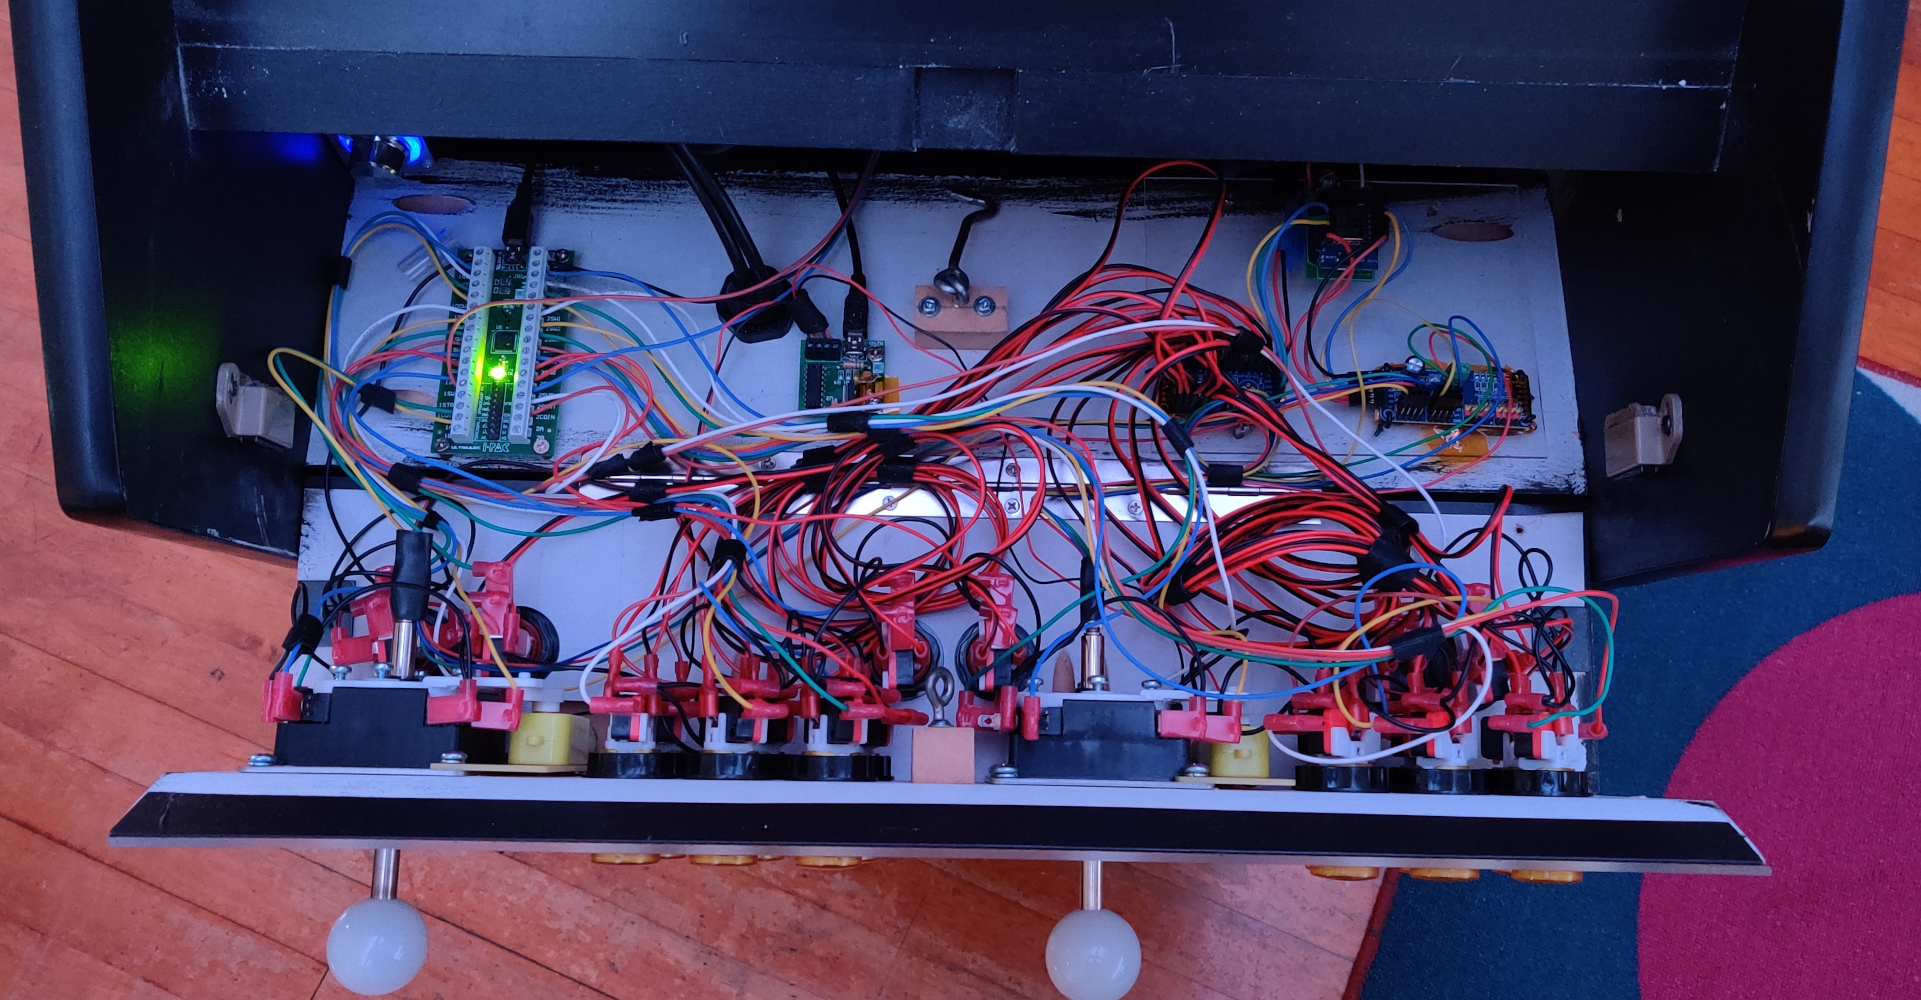
Under the panel is a pair of USB ports for hooking up retro controllers or a keyboard / mouse in a pinch. I used some magnetic cabinet latches I had laying around to keep the panel from flopping open and a old hook and loop I also had to keep the panel locked tight during normal use.
The LED strips in the marquee lighting have started to come loose a little bit as the adhesive is rather bad. When they are properly positioned the “hot spots” from the LEDs are not as bad as they appear in the images above. I need to take the marquee brackets off and adjust the led strips and secure them with hot glue (something I have done on other LED projects since then). They are all attached to a custom acrylic tray I made which disconnects and lifts out of the marquee housing for easy maintenance.
The Software
I have a combination of custom scripts and Pegasus for the menu along with retroarch and libretro for the emulation. Pegasus also supports launching steam games, which I use to play Pac-Man 256 on the cabinet, which is really fun. It is actually a multi-player game so you can play it 2 player on the cabinet. I wrote some custom software to do some magic like handling custom button mappings without needing to modify keymaps for either the games or the I-PAC for certain games, reading the MAME xml to illuminate the buttons games actually use, and swapping the servo sticks automatically depending on what is being launched. I also use the excellent skyscraper to generate the screenshots for all the games.
One of the middle buttons on the front of the panel is the shift button for the I-PAC which allows controlling the volume, pausing, saving / loading states, putting in credits etc. when held down and using the other controls.
Lighting Controller
I am using a WeMos D1 Mini to control the lighting which is running my custom LED software. The software is already written to make it easy to expose new API endpoints and be controlled by my custom android app. So I am able to control the marquee lighting just like any LED lights in my house from my android app and I expose some custom API endpoints to control the button LEDs and RGB ball tops. The custom software on the arcade cabinet just hits the endpoints on the D1 Mini when launching games. The software I wrote just uses standard HTTP GET / POST and speaks JSON so it is super easy to integrate with.
For a rough idea of how I hooked everything up, here is a quick schematic I threw together at the time.
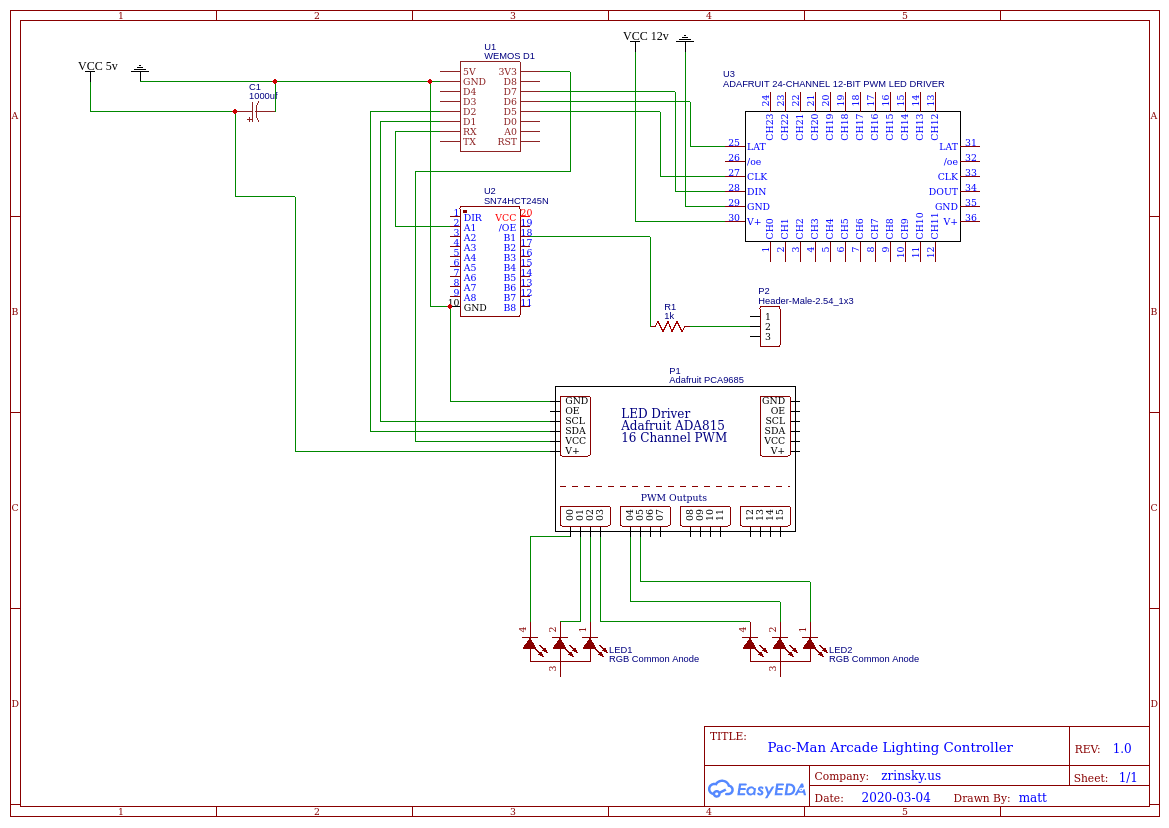
The SN74HCT245N and friends and the D1 Mini itself are actually all part of a custom breakout board I already had made previously and have used in my lighting projects since then. I use stackable headers to connect everything together depending on how many things I am hooking up. I plan to share my custom breakout board and my LED software eventually, but currently they need a little work to be ready for public consumption.
Parts
Here is a list of parts that I bought and some parts that I already owned. This is a fairly complete list but there are probably some things I forgot.
From Ultimarc
- 2x ServoSticks
- 1x ServoStick Control Board
- 2x RGB Ball Tops
- 1x I-PAC2
From Game On Graphics
- Marquee Art
- Side Art
- Kick Plate Art
- Bezel Art
- Control Panel Art
Misc Items
- 16 Channel PWM Servo Motor Driver PCA9685 i2c (drives the 5v ball tops)
- ADA1429 - 24-Channel 12-bit PWM LED Driver (drives the 12v button leds)
- WeMos D1 Mini - 3v, controls the PCA9685, ADA1429, and drives the 5v RGB marquee lighting using one of my custom breakout boards
- #10-24 Hex Flanged Threaded Inserts .394" Length
- RGB LED strip for the marquee lighting
- Lepai LP-2020A Amplifier to drive the speakers
- Gaming PC to put inside (a Raspberry Pi would work just fine)
- An old monitor (HP Pavilion w2007) which I removed from it’s housing
- Plexiglass panels for the bezel and control panel
- Kreg pocket jig & pocket screws
The Meta
- Changed the scope of this post
- Finally finished writing
- Started writing